Dehydrating Cherries
February 24, 2012 by admin
Filed under Preparing and Preserving Food Items
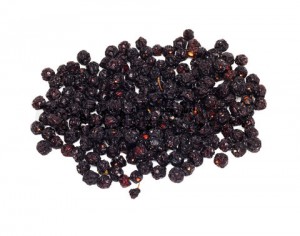 Dried and dehydrated cherries are excellent snack foods and can be eaten just like raisins – as a nice, healthy and nutritious snack. They can also be used in baked goods, such as in muffins, bread, pancakes, or other items like this that allows you to add a little bit of cherry to something to make it more delicious!
- Wash your cherries and remove any stems or pits.
- Boil a pot of water and drop your cherries into the already boiling water for no more than 2 minutes – the skin will crack. Drain. Unlike blueberries, you do not have to rush them into ice water.
- Dehydrate your cherries in your dehydrator for 13-20 hours.
- Store your cherries in a clean, dry, and airtight container in a cool dark place.
How to rehydrate dried cherries:
- Soak in hot water for 15 minutes.
Anywhere that you might use a raisin, you can also use a cherry. They are fairly versatile and go great in baked goods – or just as a nutritious little snack! An excellent item for storing in your pantry.
Dehydrating Cantaloupe
February 23, 2012 by admin
Filed under Preparing and Preserving Food Items
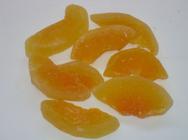 Dried Cantaloupe might not be something you would think of right away in dried fruits, but it makes great snack food as well as a great addition in trail mix that will help spruce up your trail mix with a little extra something.
- Remove the cantaloupe’s rind and seeds – which can be saved for planting if your own garden if you are interested!
- Cut the cantaloupe into bite-sized pieces about 1/4″ thick, or into thin wedges.
- Dry the cantaloupe in your dehydrator for 10-16 hours at 135 degrees F.
- Store dried cantaloupe in a clean, dry, and airtight container out of light.
It’s not recommended that you rehydrate cantaloupe. Just use it as a snack or as an addition to a trail mix.
Dehydrating Blueberries
February 23, 2012 by admin
Filed under Preparing and Preserving Food Items
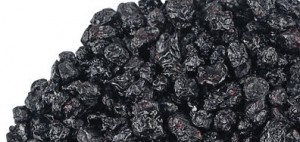 Blueberries are an excellent item for your home preserves for emergency supplies – or just as a nice addition to everyday meals or baked goods. Dried blueberries are great in dried oats or oatmeal, or even in trail mixes. They also do not need to be rehydrated to be used in baking – such as in muffins, breads, pancakes, waffles, scones, or in so many other goods. You can also use them in home-made herbal tea.
- Wash and drain your blueberries.
- Remove the stems of your blueberries.
- Drop blueberries into already boiling water and let them boil until the skins crack. As soon as they crack, drain them and them immerse them in ice water so they stop cooking.
- Drain and place the boiled blueberries on cookie sheets in the freezer until frozen.
- Once frozen, dry them in your dehydrator for approximately 6-10 hours.
- Store your dried blueberries in a clean, airtight, and dry container in a cool, dark location.
How to Rehydrate:
- Soak in hot water for 15 minutes.
While dehydrating blueberries takes a little more work than other fruits, it is well worth the effort to have a container of dried blueberries handy to use – even if its just to make some fantastic blueberry muffins!
Dehydrating Blackberries
February 23, 2012 by admin
Filed under Preparing and Preserving Food Items
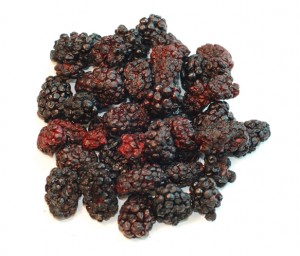 Blackberries are a little tricky, but can prove a nice addition to your collection of dehydrated and preserved goods. Often, blackberries are loaded with seeds, so you may want to rehydrate them, puree them, and strain out the seeds.
- Wash and pat berries dry.
- Removes the stems from the blackberries.
- Use your dehydrator to dry your blackberries at 100 degrees F for about 10 hours – you want them to be brittle when done.
- Store your dried blackberries like all dried goods, in a dry, airtight container in a cool, dark place.
How to rehydrate:
- Soak in hot water for 15 minutes.
You can use blackberries on ice cream, or in muffins or scones, or you can add them to trail mix. The Puree can be used in a number of ways as well – to make sauces and syrups, or to make your own cordial.
Dehydrating Bananas
February 23, 2012 by admin
Filed under Preparing and Preserving Food Items
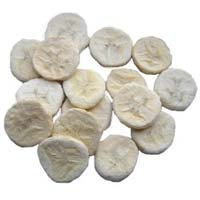 Dried banana chips are an often favorite among dehydrated fruits. They are easy to eat and quite delicious, containing many good nutrients. Dried bananas can go in in trail mixes as well. Rehydrated banana chips are great in muffins, bread, oatmeal, pancakes, and in many other recipes that might call for fresh bananas. You can easily use older bananas to use for this as well – they do not need to be extremely fresh, just not overly squishy.
- Peel your bananas.
- Slice your bananas into 1/4 slices. You could make them thicker, but it will take longer.
- Pretreat your bananas in Fresh Fruit Produce Protector solution or in pineapple juice.
- Dehydrate your bananas in your dehydrator at 130 Degrees F for approximately 6-10 hours, until nice and crispy.
- Store your banana chips in a clean and air tight container in a dark and cool location.
How to rehydrate:
- Soak in hot water for 10 minutes.
Dehydrated bananas are extremely easy to make and can have many uses for you should it come down to it – and can easily be used even if an emergency doesn’t occur! 🙂
Dehydrating Apricots
February 23, 2012 by admin
Filed under Preparing and Preserving Food Items
 Apricots are a delicious and sweet item you can easily dehydrate and preserve in order to add to your prepper collection. They go fantastic as just snacks all on their own, but they can also be used for baking, in trail mixes, or to dress up oats or cereal.
- Wash your apricots.
- Cut your apricots in half to remove the pits. You can also chop them into quarters, slices, or cubes as well.
- Dry them in a dehydrator, skin side up, at 100 degrees F for approximately 48 hours.
- Store in a nice, dark place in airtight, dry, and clean containers. Keep in mind that light will damage them.
How to rehydrate:
- Soak for 15 minutes in hot water.
Whether rehydrated or dehydrated, apricots can have a fantastic affect on your dishes, adding wonderful flavor to what might be an ordinary, drab meal – plus they are nutritious and easy to preserve!
Dehydrating Apples
February 23, 2012 by admin
Filed under Preparing and Preserving Food Items
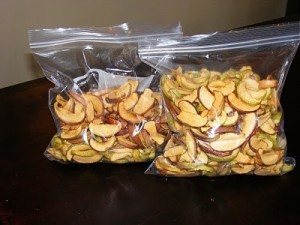 Dehydrating apples is a simple process that can be made better with a little bit of cinnamon too! They have a lot of purposes – from being eaten on their own as snakes, to adding as rehydrated goods to pies, baked goods, pancakes, oatmeals, or in stuffing.
- Wash your apples carefully.
- Peal your apples unless you want the skin on them.
- Remove the core – an apple corer is an inexpensive item to get, and saves you a lot of work!
- (optional) You can pre-treat the apples in either a Fresh Fruit Produce Protector solution, or you can use lemon juice at the ratio of 1 cup water to 1 tbsp lemon juice.
- Cut fruit into desired shape – such as 1/4″ slices, wedges, cubes, or thin sliced for apple chips.
- Dry the apples using a dehydrator at 100 degrees F for 8 hours, or until they are crispy.
- Store dehydrated apples in a clean, dry, airtight container away from sunlight – preferably somewhere cool and dark.
How do you rehydrate?
- Simply! Just soak in hot water for 15 minutes.
You can add seasoning to your apples as well right before hydrating, such as cinnamon or brown sugar to add a little extra taste to them when they are done. They can be used as just a snack on their own, or as an addition to other recipes – for breads, muffins, pies, pancakes, oatmeal, and so much more.
They are very versatile and keeping them on hand can help you make those “emergency” situations much nicer with a little bit of home preserved goodness to add to other, more blander, long term storage food.
Lightwight Emergency Stove
December 21, 2011 by admin
Filed under Food Supplies, General Emergency Supplies, Survival Tools
When you need to go, be prepared! One of the major elements you need to keep in mind is food: how are you going to get it? Or cook it? That’s why little lightweight s toves like this one, the Wetfire Stove, is great as an addition to any emergency disaster kit or camping pack.
This stove only weighs half an ounce; it folds up to store nicely. The fuel are cubes that won’t spill in your bag or cause accidental fires. It can boil a cup of water in 5-6 minutes.
Not only can you use it for cooking food while you’re trying to survive, but you can sterilize water by boiling it. It’s handy to have something like this when a disaster strikes.
Wetfire Stove
![]() Store Price: $14.41 (normally 17.95)
Store Price: $14.41 (normally 17.95)
Emergency Fishing Kit
December 15, 2011 by admin
Filed under General Emergency Supplies, Survival Tools
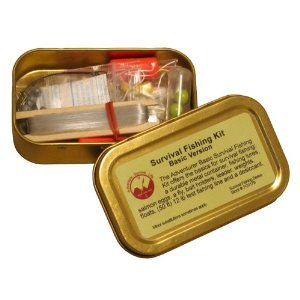 We’ve all heard the saying: Give a man a fish, he’ll eat for the day; teach a man to fish, you feed him for a lifetime.
That’s why it’s handy to keep thing likes fishing supplies in every emergency kit, including your car. Fishing is a basic necessity when stuck without basic supplies.
The kit comes in a durable waterproof tin and is small, able to fit in any kit or glove compartment. It includes: Tiny Shad Jig, Swirl Tail Grub Jig, 2 1/16 Unpainted Round Jig Heads, Salmon Egg Bait, Moisture absorbing desiccant packet, line, and more.
You can add whatever else you prefer into this little kit that makes fishing for you, personally, easier.
Basic Emergency Survival Fishing Kit
Site Price: $12.95
Emergency Preparedness Wound Closure Kit
November 21, 2011 by admin
Filed under First Aid Kits, Survival Tools
No suturing required! This kit is perfect as an addition to a First Aid kit for your emergency preparedness. When someone keeps injured, this kit can help clean out the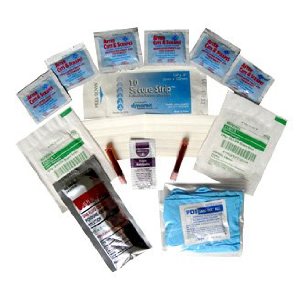 wound and close it to provide immediate care for an injured person.
This kit includes an irrigation syringe (solution not included, since it expires), wound closure strips, Benzoin Topical Adhesive, Wipes, Providone Iodine, triple antibiotic ointment, and sterile dressing gauze.
Remember: clean your wounds! Debris and bacteria is easy to get into an open wound, so keep one of these kits on hand.


